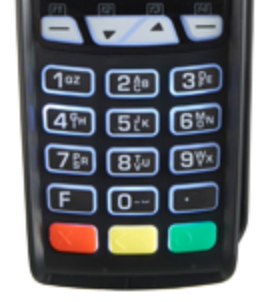
| Terminal Displays
| Action Taken
|

 |
[iCT250]
Press the [F1] button.
If Pressing the [F1] button does not get
you to the next screen, goto Here. |
| MENU |
 |

1 - Core App |
| 2 - GetiCheck |
| |
| |
| |
|
 |
 |

 |
Press the [2] button. |
| MAIN MENU |
 |

1 - Sale |
| 2 - Void |
| 3 - Reprint |
| 4 - Settlement |
| 5 - Reports |
|
 |
 |

 |
Press the [#] button. |
| ADMIN |
 |
|
 |

 |
Key in 1 and press the Green [Enter] button.
The terminal may not prompt for password. |
| ADMIN |
 |
|
 |

 |
Key in P123456 and press the Green [Enter] button.
Other possible passwords are 123456A, 123456P, 123456V, A123456, or
V123456. |
To key in a letter, press the numbered button
with the desired letter on it and then press the [F] button until you get the desired letter.  |
|
| ADMIN MENU |
 |

1 - Reports Menu |
| 2 - Clerk Menu |
| 3 - Batch Menu |
| 4 - Setup Menu |
| 5 - Batch Menu |
|
 |
 |

 |
Scroll down to Setup Menu. |
| ADMIN MENU |
 |

1 - Reports Menu |
| 2 - Clerk Menu |
| 3 - Batch Menu |
| 4 - Setup Menu |
| 5 - Batch Menu |
|
 |
 |

 |
Press the Green [Enter] button. |
| SETUP MENU |
 |
| |
| Enter Supervisor |
| Password |
| |
|
|
 |

 |
Key in P123456 and press the Green [Enter] button.
Other possible passwords are 123456A, 123456P, 123456V, A123456, or
V123456. |
To key in a letter, press the numbered button
with the desired letter on it and then press the [F] button until you get the desired letter.  |
|
| SETUP MENU |
 |

1 - Merchant |
| 2 - Communications |
| 3 - Receipts |
| 4 - Trans Options |
| 5 - Term Settings |
|
 |
 |

 |
Scroll down to Communications. |
| SETUP MENU |
 |

1 - Merchant |
| 2 - Communications |
| 3 - Receipts |
| 4 - Trans Options |
| 5 - Term Settings |
|
 |
 |

 |
Press the Green [Enter] button. |
| COMMUNICATIONS |
 |

1 - Comspriority |
| 2 - Dial |
| 3 - Ethernet |
| 4 - Display Params |
| |
|
 |
 |

 |
Scroll down to Dial. |
| COMMUNICATIONS |
 |

1 - Comspriority |
| 2 - Dial |
| 3 - Ethernet |
| 4 - Display Params |
| |
|
 |
 |

 |
Press the Green [Enter] button. |
| DIAL MENU |
 |

1 - AccessCode |
| 2 - Phone #'s |
| 3 - Baud |
| 4 - DialRetry |
| |
|
 |
 |

 |
Press the Green [Enter] button. |
| DIAL MENU |
 |

|
| Enter Access Code |
| |
|
|
 |

 |
To add the PABX:
Key in the PABX and press the Green
[Enter] button.
To remove the PABX:
Press the Yellow [<] to clear
out the PABX and press the Green [Enter] button. |
| DIAL MENU |
 |

1 - AccessCode |
| 2 - Phone #'s |
| 3 - Baud |
| 4 - DialRetry |
| |
|
 |
 |

 |
Press the Red [Cancel] button four times. |
| COMMUNICATIONS |
 |

1 - Comspriority |
| 2 - Dial |
| 3 - Ethernet |
| 4 - Display Params |
| |
|
 |
 |

 |
| SETUP MENU |
 |

1 - Merchant |
| 2 - Communications |
| 3 - Receipts |
| 4 - Trans Options |
| 5 - Term Settings |
|
 |
 |

 |
| ADMIN MENU |
 |

1 - Reports Menu |
| 2 - Clerk Menu |
| 3 - Batch Menu |
| 4 - Setup Menu |
| 5 - Batch Menu |
|
 |
 |

 |

 |
Changing the prefix is complete. |
![]()