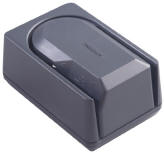
Configuration of the Magtek Mini-MICR is determined by the type of Point of Sale terminal that the reader will be connected to. There are three basic configurations for the Magtek Mini-MICR:


 Dejavoo - The configuration is for all Dejavoo series terminals are the same.
 Hypercom - The configuration for all Hypercom series terminals are the same.
 Medcom Transaction Portal - The configuration is the same as the Hypercom.
 Nurit - The configuration for all Nurit terminals are the same.
 PC Charge - The configuration is for readers connected to computers using PC Charge Software.
 PC Desktop Terminal - The configuration is for readers connected to computers using the Desktop Terminal.
 PC Virtual Terminal - The configuration is for readers connected to computers using the Virtual Terminal.
 Personal Computers - The configuration is for readers connected to computers.
 Thales Talento - The configuration is the same as the Nurit.
 TPI Software - The configuration is for readers connected to computers using TPI Software.
 VeriFone Omni - The configuration is for all Omni series terminals are the same.
 VeriFone Tranz - The configuration is the same as the Nurit.

To configure a Magtek
® Mini-MICR, a physical check is required to be run through the reader. This check must be printed with MICR, so it is not possible to fax, or photocopy a configuration check. Configuration checks can be mailed at no charge via first class mail, if you require a configuration check to be shipped overnight, please provide a UPS, DHL or FedEx account number when placing the order.

The Configuration Check may be on check stock or plain paper, but should look similar to below:

Magtek Mini-MICR - VeriFone Omni

This check is designed to configure a Magtek Mini-MICR check reader to interface with a
VeriFone Omni terminal.
Insert this check, beginning on the left side of the reader, with the check face towards the inside
of the reader. After successful configuration, the green LED will blink 8 times.
If at any point the LED turns red, repeat this process until successful configuration is achieved.

*THIS IS NOT A TEST CHECK*

Please cut as close to the line as possible to ensure readability.
Item # C-02
Check 1 of 1


For Technical Assistance
Contact: 1-877-438-3249

© Paya Services 2018


Configuration Check Order Form


* * * * * * * * * * * * * *
In order to print your own Configuration Checks,
you MUST use MICR ink in the printer.

* * * * * * * * * * * * * *

Click on the Printer Icon for the Configuration Check file.
Terminal Type Item # MICR Data
Dejavoo (All Models) C-04 Print Config Check for Dejavoo
Hypercom (Excluding ICE 5700)
Medcom Transaction Portal
C-03 Print Config Check for Hypercom
Ingenico (All Models) C-18 Print Config Check for Ingenico
PC Charge (Software)
USB Wedge
C-16 Print Config Check for PC Charge
Check 1 of 2                            
Check 2 of 2                            
PC Desktop Terminal C-26 Print Config Check for PC-USB
PC Virtual Terminal
USB Keyboard Emulator
C-05 Print Config Check for PC-USB
TechTrex PrimeTrex IP C-19 Print Config Check for Hypercom
Nurit / VeriFone Tranz C-01 Print Config Check for Nurit/Tranz
TPI Software
COM1 (
Serial Only)
C-21 Print Config Check for TPI Software
VeriFone Omni (All Models) C-02 Print Config Check for VeriFone Omni


After configuring the reader a Test Check can be ran to verify the configuration.
SPS-EFT Test Check C-13 Print GETI Test Check


Updated: 09/27/2018