![]()
| Removing the Empty Paper Roll: |
|
| 1. | Remove the paper compartment cover. |
| 2. | Remove the roll paper core and spindle. Discard the core but save the spindle, if installed, to be used with a new paper roll. |
| 3. | Remove any paper left in the printing mechanism by pressing the |
| CAUTION: Do NOT pull the paper backwards through the printer mechanism. This may damage the printer. |
|
| Inserting a New Paper Roll: |
|
| 4. | Unroll the new paper roll so that the imprinted side of the paper facing you. Lay the paper roll directly behind the printer. |
| 5. | Using scissors, cut the leading edge of the paper roll so that it is perpendicular to the paper feeder and not jagged. |
| 6. | Insert the leading edge of the paper underneath the printer mechanism's rubber platen roller. The printer mechanism should automatically catch and feed the paper. Press the Blue [Feed] button in short increments until the paper comes out a few more centimeters. |
| 7. | Lift up the paper roll and tighten up any excessive paper slack. Make sure
that the paper unrolls from the bottom.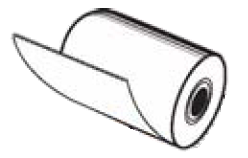 |
| 8. | Slide the spindle into the paper roll and lower the paper roll into the spindle slots on each side of the paper compartment. |
| 9. | Replace the paper cover by first inserting the tabs on each side of the cover into their designated slots on each side of the paper cover. Be sure that the paper extends outside of the cover before closing. |
| 10. | Press down on the back of the cover until it snaps in place. |
| You may now use your new paper roll. | |