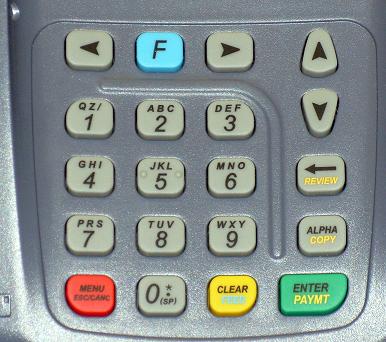
| Terminal Displays
| Action Taken
|
| CREDIT . . . . . . . . . . . . . SALE |
ACCOUNT
 |
| |
| |
|
 |
|
Press the [Menu/Esc] button.  |
| ENTER PASSWORD: |
| |
| |
| |
|
 |
|
Key in the current password and press the [Enter/Paymt] button. |
|
| MENU SCREEN: |
| 1. Reports |
| 2. Merch. Params |
| 3. Merch. Options |
|
 |
|
Use the Down [ ]
button to scroll down to Merch. Params. ]
button to scroll down to Merch. Params. |
| MENU SCREEN: |
| 1. Reports |
| 2. Merch. Params |
| 3. Merch. Options |
|
 |
|
Press the [Enter/Paymt] button. |
| MERCH.PARAMS: |
| 1. Authorization |
| 2. Security Level |
| 3. Edit Header |
|
 |
|
Use the Down [ ]
button to scroll down to Ind. Prompts. ]
button to scroll down to Ind. Prompts. |
| MERCH.PARAMS: |
| 6. Merchant Fee |
| 7. Set Batch Time |
| 8. Ind. Prompts |
|
 |
|
Press the [Enter/Paymt] button. |
| IND.PROMPTS: |
| 1. Clerk ID Mode |
| 2. Invoice Mode |
| 3. Cashback Prmpt |
|
 |
|
Press the [Enter/Paymt] button. |
| CLERK ID MODE: |
| 1. Off |
| 2. On |
| |
|
 |
|
Use the Down [ ]
button to scroll down to On. ]
button to scroll down to On. |
| CLERK ID MODE: |
| 1. Off |
| 2. On |
| |
|
 |
|
Press the [Enter/Paymt] button. |
| CLERK ID MODE: |
|
|
 |
|
Key in the number for the Server ID and press the [Enter/Paymt] button. |
| CLERK ID MODE: |
ID#1 Name 1N
 |
|
|
 |
|
Key in the name for the Server and press the [Enter/Paymt] button. |
| CLERK ID MODE: |
ENTER CLERK ID:
 |
|
|
 |
|
Key in the number for the Server ID and press the [Enter/Paymt] button. |
| CLERK ID MODE: |
ID#2 Name 1N
 |
|
|
 |
|
Key in the name for the Server and press the [Enter/Paymt] button. |
| CLERK ID MODE: |
ENTER CLERK ID:
 |
|
|
 |
|
Key in the number for the Server ID and press the [Enter/Paymt] button.
Continue until all Clerk/Servers have been entered, then press the [Menu/Esc]
button. |
| IND.PROMPTS: |
| 1. Clerk ID Mode |
| 2. Invoice Mode |
| 3. Cashback Prmpt |
|
 |
|
Press the [Menu/Esc] button three (3) times. |
| MERCH.PARAMS: |
| 6. Merchant Fee |
| 7. Set Batch Time |
| 8. Ind. Prompts |
|
 |
|
| MENU SCREEN: |
| 1. Reports |
| 2. Merch. Params |
| 3. Merch. Options |
|
 |
|
| CREDIT . . . . . . . . . . . . . SALE |
ACCOUNT
 |
| |
| |
|
 |
|
Change(s) complete. |