|
P/N: 6000-6060 (HP C6602A) |
     |
|
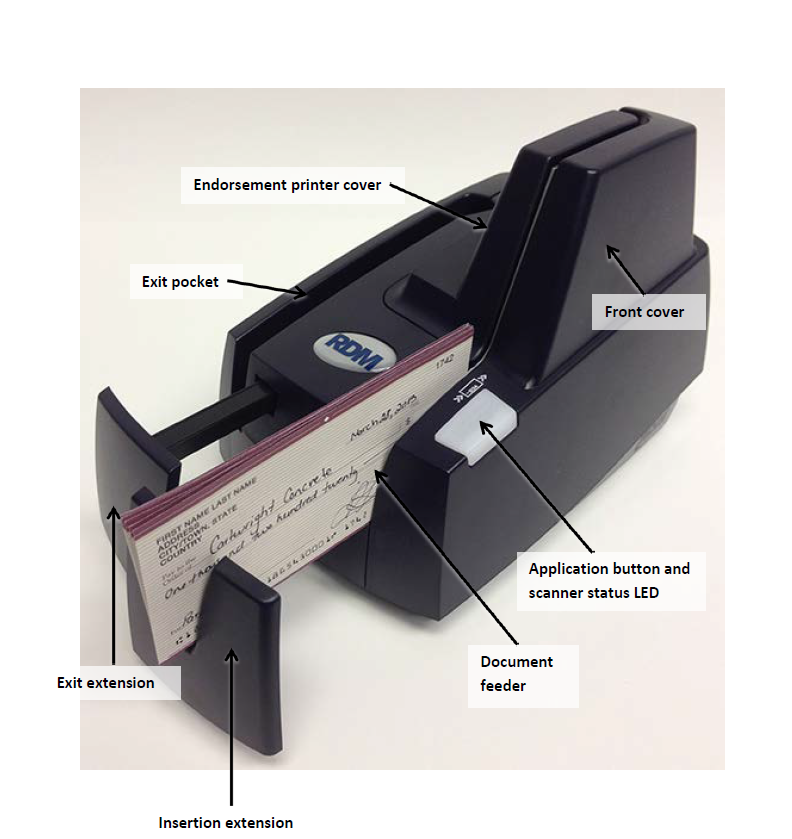
| I. | To access the Endorsing Area: |
| Remove the endorsement printer cover when you need to clear paper jams, to insert or replace the endorser inkjet printer cartridge, or to clean the image sensor. | |
| 1. | Disconnect the power cord from the scanner. |
| 2. | Grasp the top of the endorsement printer cover. |
| 3. | Gently pull the cover upwards until it detaches from the scanner. |
| 4. | Rotate the unit around to expose the top, this way you are looking down into the endorsement area. |
| II. | Installing the Endorser Ink Cartridge: |
| When you place the new inkjet cartridge into the holder, make sure that you insert it at the angle described in the following steps. If you do not insert the cartridge properly, it might not make contact with the document when it is scanned. | |
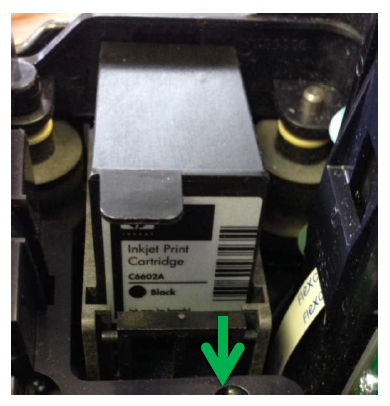
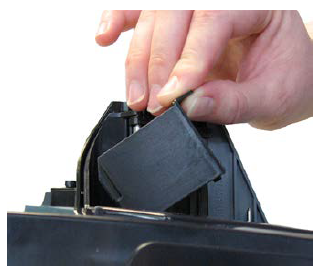
| 1. | Pull the inkjet latch away from the inkjet cartridge (as pictured). |
| 2. | Pull the old inkjet cartridge, if installed, out of the scanner. |
| 3. | To insert the new inkjet cartridge, pull the inkjet latch back and place the inkjet cartridge into the holder. The cartridge needs to be at an angle so that the back of the cartridge is lower than the front of the cartridge (as show in the bottom picture on the left). |
| 4. | Push the cartridge down into the holder until the cartridge snaps into place. Once installed, the inkjet cartridge sits on a slight angle with the back of the cartridge lower than the front. |
| 5. | Make sure there is no gap between the inkjet cartridge and the endorsement channel. |
| 6. | Replace the endorsement printer cover. |
| III. | Replacing the inkjet blotter: |
| Scanners with endorsement printers include an inkjet blotter that
absorbs excess ink from the endorsement process. Over time, the blotter might stop absorbing ink effectively
and so should be replaced. Scanners with endorsement printers come with five replacement blotters. To replace the inkjet blotter: |
|
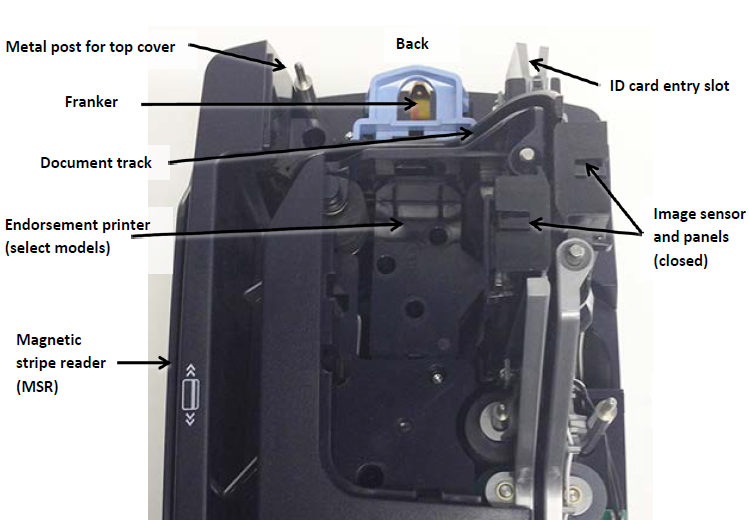
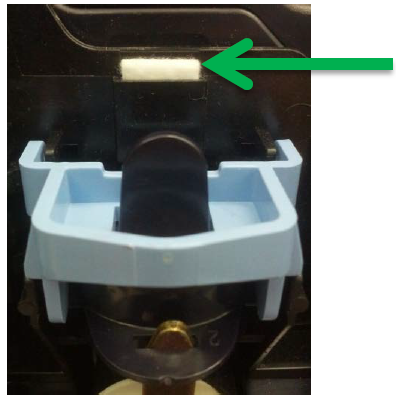
| 1. | Remove the front cover of the scanner. At the back of the scanner, above the franker cartridge, you can see the top of the inkjet blotter, as shown to the left. |
| 2. | With your finger or tweezers, remove the inkjet blotter from its slot. |
| 3. | Dispose of the used blotter. |
| 4. | Insert the replacement inkjet blotter, RDM Part Number 302987, into the slot. |
| 5. | Replace the front cover of the scanner. |